Today I tried out the milling blade from my processor. I have a bag of Paulouse Hard Red Winter Wheat Berries (grown in Palouse, WA) that I’ve used for a sprouted wheat experiment (keeping the wheat berries whole instead of drying and grinding them) that I liked. This time I milled flour from these berries instead of using my Arrowhead Mills stoneground WW flour.
I adapted my typical recipe to 300g all purpose flour, 120g freshly-milled Paulouse HRWWB flour, and 35g Arrowhead Stoneground Rye flour. This time I added 5g of gluten powder to see if it helps with the rise and oven spring. 300g water went into the dry ingredients.
I had two batches of starter going from Friday night, one with APF (which had very small bubbles throughout and was about the consistency of thick buttermilk) – and one that I’d put together for the levain from 50g of the APF starter, and 50g each of Arrowhead stoneground Rye flour and water, that had big bubbles throughout. In the morning I mixed about 14g of the APF starter into the Rye starter, added a little more rye flour and water and let it “refresh” for several hours. While it refreshed, I combined the dry ingredients and water and let them autolyze.
When the starter domed again, I used 94g of the starter (which was fairly stiff and full of big bubbles) and 25g warm water that went in about 3 hours after the flours and water were combined and let autolyze. I mixed the starter solution into the autolyzed flour before adding 10g salt and mixing that in. I folded the dough 7x in 30 minute intervals before pre-shaping the dough for the banneton.


Kitchen temp was 76-78ºF during the autolyze and folding process. Sampling the dough, the home ground flour in the mix has great up-front wheat flavor from the freshly milled wheat berries.
The dough was nice and stretchy and a little sticky, and it built up a lot of tension over those seven folds. It shaped nicely and didn’t slump when left to rest before I placed it in the banneton and tucked it away in the fridge.

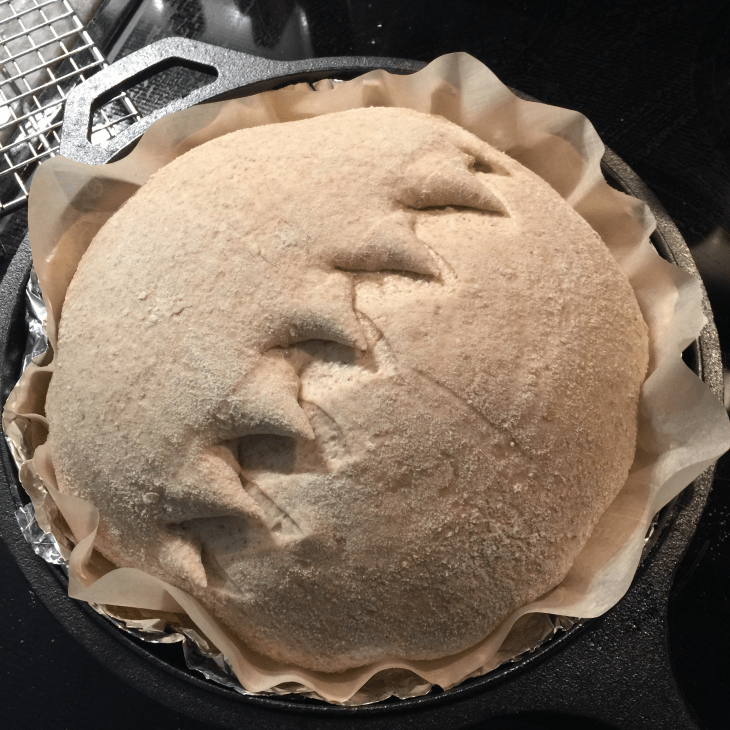
Sunday morning…with a few hours left in its bulk fermentation it looked like this:

The texture is cornmeal I sprinkled over the top so it wouldn’t stick to the plastic bag. It will also help keep the bottom from over-baking once it’s put in the cooker.
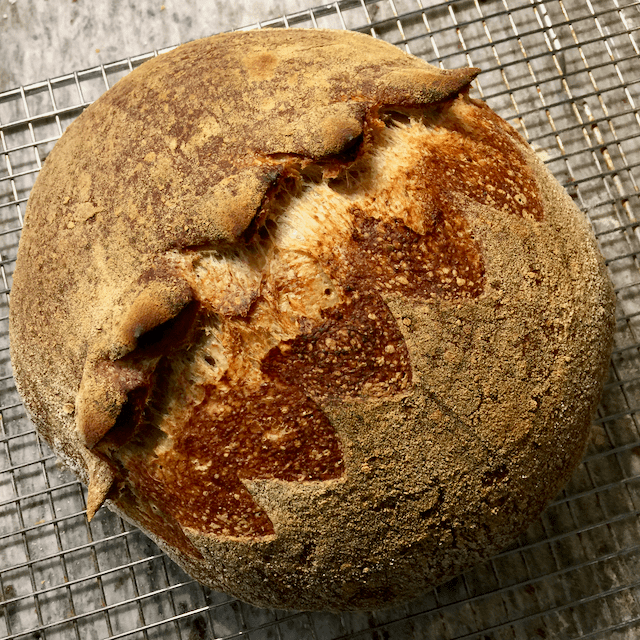
Heated up oven (to 475ºF rather than 500) and prepared the bread. Used a round of parchment over the banneton and the cooling rack that you can see the corner of to flip the banneton and slide the dough into the combo cooker. I put two layers of parchment with foil underneath to keep the bottom from overcooking, with cornmeal on the bottom layer of parchment (this may be one too many layers but the last bake overcooked the bottom so I may be erring on the side of caution here). After it was in the cooker I made 7 scissor slashes across the banneton seam, resulting in this (There are some nice bubbles in the exposed dough):
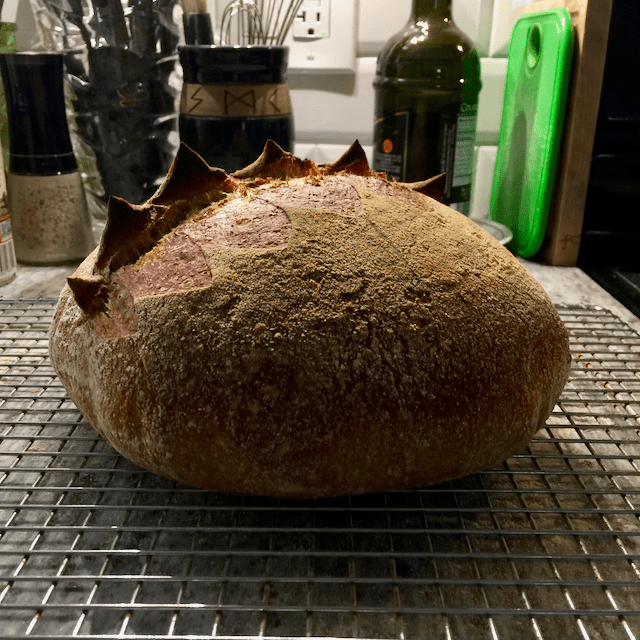
Baked for 25 minutes at 475ºF before removing the dutch oven portion, then let it brown up for 10 more minutes. Bottom has not overbaked and my layers of foil/parchment worked perfectly. This is actually a bit darker than I usually bake. Interior temperature when removed from the oven was 210ºF.
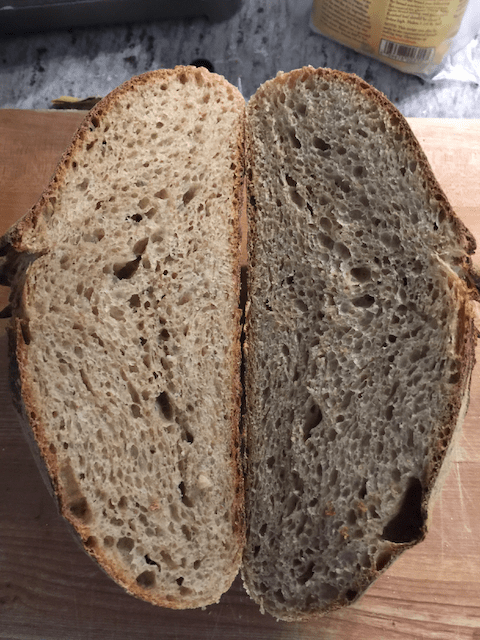
Waited for the bread to stabilize and when I cut it it was just warm.
Yep, it’s good.