In this post I talk about my logic behind the tools I chose for preparing and baking bread. I am a little bit of a gadget person, but still want to spend my money wisely. Defining “tools” for this post: Items used to prepare or store ingredients used in the baking of bread.
The most useful tools need to suit the person using them. I am not the strongest nor most physically-coordinated person in the baking hobby so I took that into consideration when looking for a Dutch oven. The 3.2 qt. Lodge cast iron combo cooker weighs 13 lbs. It was enticing because of the handles and the ability to use the lid/griddle top to slide dough onto. Then I imagined wrestling the probably 8 lb. 400+ degrees hot Dutch oven bottom over the dough and thought… too risky for me! So I bought an enameled Dutch oven, 6 quart volume I wanted, weighs the same as the cast iron combo cooker. The next size up 7 qt cast iron Dutch oven with a flat lid (that also does double duty when flipped over) weighs over 15 lbs, is really too big, costs more than the enameled Dutch oven I bought, and I figured I’d be fighting above my weight wrestling the heavier, bigger pot.
BUT… I got a little paranoid about wrecking the enamel of the Dutch oven. Even though I’ve used it for over a year at temps around 450ºF and possibly above, and cannot yet see any obvious evidence of cracks in the enamel, I don’t want to ruin it with crazing the enamel with repeated exposures to the heat necessary for a good oven spring (over its rated 400º limit). It’s perfectly useful for other 400º F max cooking jobs. So I recently went ahead and purchased the 3.2 quart Lodge combo cooker. It is actually easier than I thought it would be to handle because of the skillet-style handle on one edge and small handle on the other. This lessened my fears about “wrestling” the deeper portion of the cooker over the dough. The combo cooker gets tested tomorrow in my Sunday bake.
Whether the combo cooker purchase was sensible or part of gadget-freak pathology … this remains to be discovered.
Next necessity was to find starter glass containers that were easier to clean than my wide-mouth quart mason jars. Glass isn’t a necessity but it’s easier to see through than BPA-free plastic, and … prettier. I had two of the squared-off wide mouth jars and an old pickle jar that I was using to transfer, mix, produce and store the sourdough starters. I needed a better system. Although they work, cleanup takes too much time when a jar has been in fridge for a while. I really needed at least 4 containers, two for active starters and storage.
I have established a routine of keeping at least 2 containers of mature starter in the fridge, “archived emergency backups” of starters that contain a little of the very first batch I made 18 months ago… and feed them weekly), and two for more frequent refreshes and for new mixes of levain. When I needed a clean jar with the mason and pickle jars I had to clean one of them out or transfer most of the contents into another jar, cleaning the jar for the levain build… it was too much work.
I thought about this for quite some time before ordering a set of six of the Weck 3/4-liter mold jars with lids and seals. Once I made the change it’s easy to see why my baking muse The Perfect Loaf’s Maurizio Leo recommends them. The glass tops eliminate the need for cheesecloth and rubber bands as they let a little air in, unless you use the rubber seals and clips. I will say that the clips are a little fiddly (and they have an amusing trait of shooting across the room when they aren’t clipped on correctly, but that’s a learning-curve fix). These jars are much better than the mason jars because you don’t have to work nearly as hard to clean, due to their straight-sided design, no threaded top, and very few places for starter to hide.
A digital scale – since measurements in baking are critical and I can’t yet measure by eye. I have an inexpensive and accurate digital scale that uses 2 AAA batteries and has an easily-readable display and easy-cleaning stand. The model I bought toggles between grams, liters/mls, lbs. and ounces, has an 11.3 lb / 5125g capacity, and has a 2 minute battery-saving shutoff. Granted, I could have bought an analog scale but this scale works and its compact (at about 9 inches square, 1.5 inches high) size works for me.
A bench knife for cutting dough and scraping the flour off the bread board (I have a butcher block I use as bread board as I use oil often with the kneading and that would stain my stone countertops) … is another necessity. I bought a stainless steel one with a non-slip plastic handle. It has a ruler etched into one side of the steel blade that is also useful for measuring rather than eyeballing widths of dough.
Good long oven mitts are a necessity. After one painful burn to the forearm when I touched it against the top edge of a hot oven (I realize this labels me as wimpy, but ouch), I bought a pair of (amusingly-named) “Sili Mitts” that prevent these “bakers’ brands” very well. These oven mitts are sufficiently long to protect skin from contacting the hot inside edge of the oven, are flexible and allow a good grip on the hot pan, and good to 500ºF / 260ºC. Good protective equipment for anyone who uses an oven frequently.
A bowl scraper, while not absolutely necessary (a spatula would also work), is very handy for both (as one would imagine) scraping dry or wet ingredients down into the dough when mixing and for manipulating the dough in general. I bought the Matfer nylon scraper, and it is very thin and pliable. It should NEVER go in the dishwasher as it will deform, and I dyed mine (you can use food coloring and vinegar, I used a turmeric and vinegar solution) so that I can easily find it in the drawer (its original color is about the same color as white parchment paper so I kept “losing” it on the counter and in the kitchen tool drawer). I use this bowl scraper every time I bake bread (particularly now that I can find it easily!).
There is a repeated story that metal tools can ruin your starter. This as it turns out is mostly myth. While reactive metals might hurt your starter, most metal utensils these days are stainless steel which won’t react with your starter – and you can easily mix your dough in a stainless steel mixing bowl (I use glass just for its visibility). That said, I like silicone tools for mixing the starter and have a narrow (1-1/2″ across) but sturdy silicone spatula just for this purpose. It’s the same one Maurizio (see above) recommends in his tools list, and it is useful for much more than just mixing starter.
Also not absolutely necessary but also very handy, is a Danish-style bread mixing whisk that I use when I don’t want to mix together the wet and dry ingredients by hand. It looks like this (I see I need to clean it up a bit before next use):
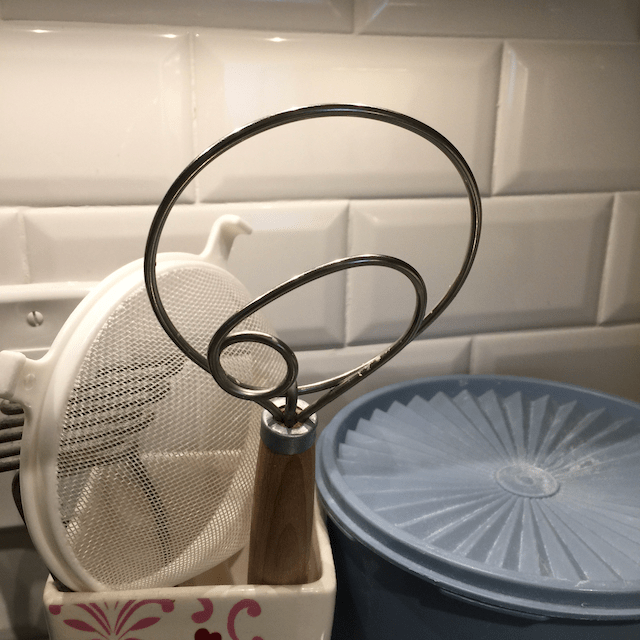
The Danish-style dough whisk has a 4-inch stainless steel head and a 10 inch beech wood handle, and makes mixing the dough easy, particularly if you’re working a 2-loaf recipe. The one I bought was made in Poland. I used it to mix the ingredients for tomorrow’s bake, which will bulk ferment tonight.
One of the nylon-mesh strainers I use are also in this picture. I use the one pictured to sift flours (and to rinse dried beans/quinoa/rice, veg and fruit, and strain canned goods), and a tea-strainer size smaller than the one shown (it has a finer mesh) to distribute the flour on the bread board before kneading or shaping dough. I haven’t yet figured out to hand-cast the flour without getting it everywhere, and the tea strainer works perfectly.
Parchment paper designed for cooking is borderline necessary (and I use a lot of it). For the sourdough bakes I use it as a means to transfer the dough into (and out of) the baking pan (When using a Dutch oven, the paper stays under the dough during the bake, and is used to lift the finished loaf out – this may change with this Sunday’s bake in my new combo cooker as I’ll be setting the dough on the shorter reversible lid/griddle base) and I also cut an extra circle of parchment to set under the loaf, adding a layer of aluminum foil under it, so that the bottom doesn’t over-bake. I currently use the PaperChef brand but have used Reynolds and Kirkland brands, the longer 15-inch width of each. Reynolds was good and had 1 inch grid-lines on the paper, which was helpful when measuring lengths and could be useful spacing biscuits or rolls, Neither the Reynolds or Kirkland got too scorched to lift; however in my last bake the PaperChef got a little more cooked and brittle than the Reynolds or Kirkland during the uncovered portion of the bake, which caused the handle corners to tear, so I couldn’t use the paper as a reliable lift and used my long oven mitts to remove the bread. I probably will go back to Reynolds or Kirkland brand when the PaperChef roll is used up. I also use baking parchment for roasting veg or meats as it makes cleaning up the half-sheet baking pans I use easier and protects their coating from degrading as quickly.
Flour storage containers. I already had a Tupperware flour canister that holds a 5 lb. bag of flour, but did not want the added expense to find more to match. The canister I have is “vintage” and these come in sets that are available, but pricey, and include container sizes I don’t need. Instead, I got a set of 3 Cambro brand NSF approved 4 quart containers with snap top lids and graduated measurement markings on the side. Each holds a 5 lb. bag of flour. The third one is currently not being used for flour storage, but is used for the folding and bulk fermentation stage for a batch of dough.
Food processor for milling flour: While not necessarily “necessary” I have one of those Nutri-Bullet high speed blenders that has a milling blade perfect for this job. Since I rarely use it now for juice I figured it would be a shame not to use it for something. It works very well and in about a minute, from grain, comes flour.
If you have favorite tools you use with your baking let me know!

One thought