Update: After this long, long day of drying fruit I broke down and purchased a small food dryer that didn’t cut the time down but meant I wasn’t running my electric oven for 18 hours. More efficient drying and less energy used, plus the ability to cook in the oven while drying fruit in the new machine = happy me. Further update: I used the dryer only one autumn to dry fruit to take to work or put in granola. After that, it sits unused somewhere in my small condo kitchen. Good intentions and I put a lot of fruit to use in the fall months. Will likely pull it out and use it again… someday.
All that said:
The prep is essentially the same either way, minus the cheesecloth… but… if you DON’T have or want a food dryer, here’s the oven method:
Might seem like an odd thing to do on a Summer day, but… the temps aren’t too bad and I had two pints of blueberries that were going to go to waste.
What you need:
Fruit. (you would think this was obvious.) …
The fruit needs to be ripe but not too ripe.
Small fruit with skins doesn’t need slicing (blueberries, in my case, don’t need slicing).
Larger fruit (strawberries & larger) needs slicing. Haven’t done those yet so don’t know how thick.
Cheesecloth (a new clean package. Mine was 2 yards and probably cost $2 at the grocery store). This will cover your oven rack. One package covered one rack (see below)*
Binder clips or big safety pins (these will hold the cheesecloth to the rack so the fruit doesn’t escape while drying.)
The process:
Wash fruit.
Put sufficient water to cover berries in a bowl and add juice of one lemon (I used concentrate so I’ll see how it goes.
Let soak @15 mins. (this apparently helps the fruit retain its Vitamin C. I wonder if it also helps preserve it. Dunno.)
You can drain the fruit and dry it in a towel (that will help later on when you lay it out on the rack).
Take one or both of the oven racks out and set them on a clean flat surface (this is where you are going to lay out the fruit.)
Heat oven to LOWEST temp (mine is set about 3/4″ below the first mark which is 200ºF… my thermometer says it’s at roughly 160ºF)
*While oven is heating, open cheesecloth package. (If like me you have 2 yards of cheesecloth, you will need 1 pack per rack. I only used one rack.) Cheesecloth is a good surface because the heat and air circulates through it well (rather than using cookie sheets and parchment)
Lay the cheesecloth (unrolled but not unfolded) over the rack lengthwise and trim so that it’s about the width of the rack. I have a 30″ oven so I cut the cheesecloth into two @30″ pieces and overlapped them in the middle of the rack.)
Clip or pin the cheesecloth at the corners and at the sides where the cheesecloth overlaps. (My binder clips are the half-inch size and I used six… you could stretch the cloth across the rack fairly tight but as long as it’s taut enough the fruit won’t sag too much. You just want to keep the small fruit from falling through the rack.)
Now lay out your fruit… you don’t want it touching but you want it pretty close if you have much. Two pints of blueberries fit on one rack.
Carefully move the rack full of fruit to the oven – if you haven’t secured the cheesecloth well, you’ll need to adjust your clips or pins before you pick up the tray. Slide the tray(s) in place at the top of the oven.
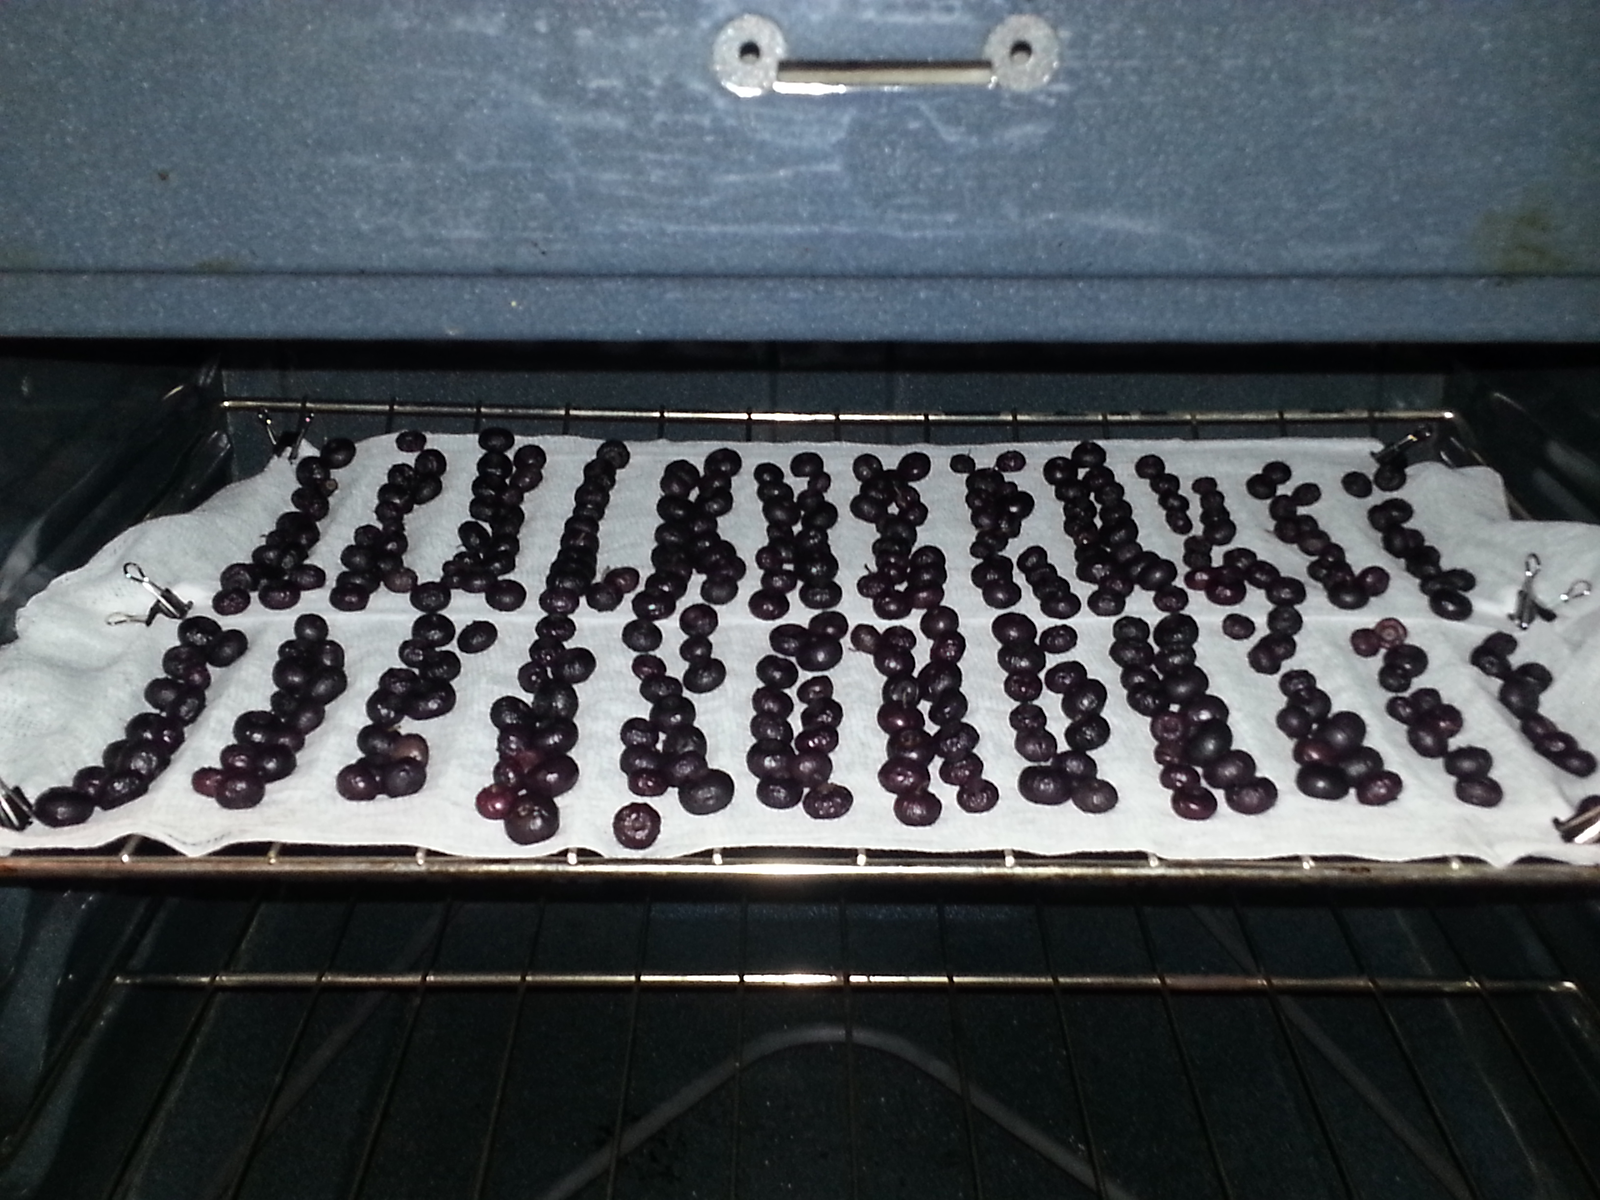 |
| The photo shows what they looked like about the three hour mark. (They are beginning to “raisin” up a little. Looks like at least a few more hours will be needed.) You can click the photo to enlarge it and see how the fruits’ skin is starting to pucker a little. |
You will want to keep the door slightly ajar to let steam out… I did this by putting a wooden spoon between the door and the top frame of the oven. If you have a thermometer (a regular food thermometer of any sort will do) you can check the temperature now. It seems that between 135º-165ºF is a good temperature for drying. (if the thermometer is one with a plastic dome, like those pocket thermometers used in food service, do NOT leave it in place after checking the temperature, as the dome will melt.)
How long?
Several hours will be needed to dry the fruit. You will want to monitor it every hour to be sure it’s drying sufficiently… at first just check with the oven light. When the fruit starts to dry it will shrink and become leathery. You don’t want it crunchy, just dried out to a chewy and leathery consistency.
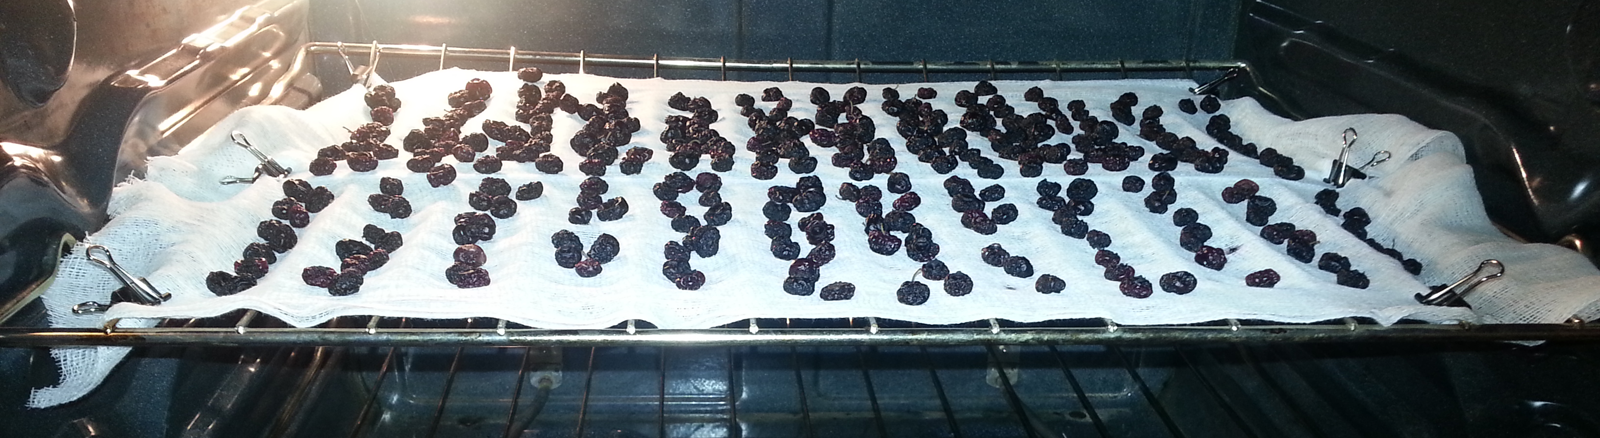 |
| Note the raisin-like change in size … this is … 7 hours in. Most of the blueberries are sufficiently dry, I am letting them stay in for another hour just to be sure. Then they’ll cool for 12 hours. |
Once it’s done you will need to cool it (for at least 12 hours)… Remove it from the oven on the rack… I would suggest you cover (or tent) it with a thin layer of cheesecloth particularly if it’s “fly season” … but don’t know if this is necessary.
That’s how it’s done… I’ve read that once it’s cooled, you can heat it to 175º for about 10-15 minutes in order to kill any insect eggs that might be inside (yuck) thus the suggestion to protect it from critters.
It’s suggested that you store the dried fruit in the freezer … but I think that if you’re going to use it right away, a plastic storage container would be fine. If it’s sufficiently dry it should not mold… and I would think that if you laid the fruit in layers with paper towels between each, that would keep it better.
I’ll report on how mine turns out! (several hours to go on my first batch.)
– Rosie
Afterword: 7 hours in, I took the photo of the dried (or nearly dried) blueberries. Most of them (95%) look like raisins now, and are leathery. I think that with a (very) little more time, I’ll remove them and let them cool. (and a little later) They turned out well and every one was eaten.
